Hydrating Concealer

http://www.amazon.com/shop/alisonviktorin

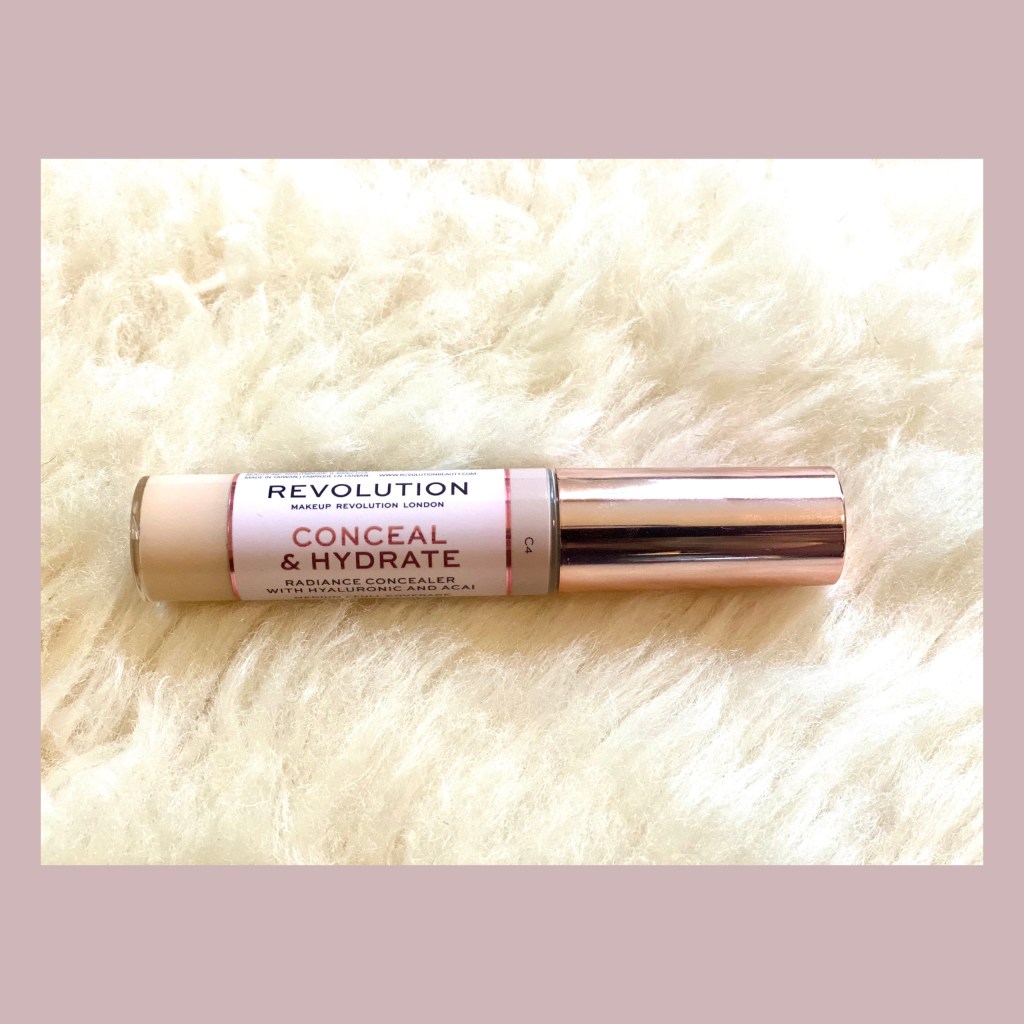
I was perusing the aisles of Target and came upon this pretty little concealer…I’m a sucker for pretty packaging. It was so cheap that I thought I’d give it a try without looking at any reviews first. When I got home, I put a tad under my eyes…You guys! This felt like Heaven, no joke! So smooth, so hydrating, definitely worth a try.

From Amazon:

  • PREP SKIN, Blur and prep the skin for makeup application with the Conceal & Fix Mattifying Primer.
  • LIGHTWEIGHT FORMULA, This lightweight, translucent formula is enriched with salicylic acid to soothe the skin and help to minimise the appearance of redness and blemishes.
  • HOW TO APPLY, After skincare, pump a pea-sized amount of product either directly onto the skin, or onto the back of your hand before using your fingers to smooth all over the complexion.
  • CRUELTY FREE, Created with natural ingredients and a formula that features 100% cruelty free additives. Being vegan friendly and gluten free, this cream makeup contour kit is universally flattering.

From the Revolution website:

This concealer is suitable for everyone looking for a lightweight finish with a boost of moisture. Offering all-day hydration thanks to an infusion of hyaluronic acid, it covers blemishes, evens skin tone and counteracts dark circles, while drenching skin with moisture. Designed for drier skin, the sheer, satin finish won’t settle into fine lines, and the doe foot applicator allows for a smooth, delicate application.

The Revolution Conceal and Hydrate is a great concealer to try if you want something smooth and hydrating. It’s inexpensive, lots of colors to choose from, and goes on so nicely. Definitely worth a try.

Maybelline Sky high

https://smile.amazon.com/Maybelline-Volumizing-Buildable-Lengthening-Multiplying/dp/B08H4FSGDW/ref=sr_1_1?crid=QLHAV31N7NN1&dchild=1&keywords=maybelline+sky+high+mascara&qid=1611521108&sprefix=Maybelline%2Caps%2C209&sr=8-1

I thought I’d share the latest, greatest, cheapest mascara today! All it takes is 3 coats and you’ve got the longest lashes around. 1 coat will give you a nice length, but the recommendation is 3 coats to give you that falsie look. I usually buy expensive mascara ($25-30 range), but there were so many good reviews for this that I thought I should give it a try. The Sky High did not disappoint. There are no clumps or flakes, just good ole length. In order to help you manage your expectations, I feel that I should tell you I don’t feel it’s that volumizing. The length is great, though.

From Amazon:

  • Sky high lash impact from every angle, full volume meets limitless length
  • Maybelline Lash Sensational Sky High mascara’s exclusive flex tower mascara brush bends to volumize and extend every single lash from root to tip
  • This Maybelline volumizing and lengthening mascara formula is infused with bamboo Extract and fibers for long, full lashes that never get weighed down

You can purchase this mascara at Target and Wal-Mart, too…greatness for less than $10. Highly recommend.

This is Sky High in action. Thought you’d appreciate a slo mo video, to see what I’m workin’ with.

This is some serious Length, right?

Next time you’re at the grocery store, go ahead and pop Sky High in your cart. I approve.

Let me know what y’all think about this mascara? Did you get any flakiness? Did your lashes look super long, too? I wanna know it all!

You can purchase these items here: http://www.amazon.com/shop/alisonviktorin

Semi-Permanent Eyeliner

Before/After

Who knew semi-permanent eyeliner has come such a loooong way?! No more discoloration, no more overly thick lines, no more sleepy eyes.

Why did I get it done?

My neurotic self despised having uneven eyeliner, I could never get my wings even. Cut to me getting my brows microshaded and I realized: Hey, it’s been so much easier having my brows done, wonder if they could do the same for my eyeliner. And, oh yes, they can!

Nitty Gritty

The cost was $550. It takes anywhere from 2 to 3 hours. And, no, it is NOT pain free. I’ll be honest, I had more pain with the eyeliner than I had with my brows. Also, my eyes watered continuously, which I hear is kind of rare. Tip: put numbing solution on your eyes even before your appointment.

The artist can make your liner look thicker, thinner, cat eye, natural…they will know what works best with your particular eyelid. It might seem like a lot of work, but the truth is, it’s made my life easier. No more getting cross and frustrated over mismatched lines, or even the anxiety of having to begin lining. Lol! Tip: If you go more natural, the good thing is that you can always bump up the drama by adding more liner on top of the tattoo. Win Win! Also, you won’t wake up looking like a Vegas Showgirl, only in the eye area. Ha! Also, I would recommend staying away from getting your bottom lash line done.

The first pic, is the Before…the rest are throughout the healing process. Healing is fast, by the way. By Day 4, I felt comfortable wearing makeup.

Hope this helps you in your Beauty Journey. This has really made my life easier.

All About Brows

Microshading/Microblading

Just do it! Hahaha! If you’ve been on the fence about getting your brows microbladed or shaded, I’m here to tell you…it’s worth it.

First, let me give you a definition from healthline.com: Microshading is a procedure where a cosmetic technician applies semipermanent makeup to your eyebrows. It’s a type of cosmetic tattoo procedure. Using pigment ink and a handheld tool, the technician places tiny, pin-like dots over the brow area to fill in thin spots.

My brow journey started because my left eyebrow is higher than my right. Whenever I wear sunglasses my left eyebrow played peek-a-boo with the rim…It’s like Hey World, do you see me?! Ugh, so frustrating. So, I started getting them waxed, to help shape them and make them look at least, related. This didn’t work, so I started getting botox to bring my right side up to my left. This worked better, but I was still self-conscious, when the ‘tox started wearing off. In came Brow Lamination, this will be another blog post. The BL got me used to growing out my brows and seeing what they’d look like with more oomph. The problem was the price, I was spending over $100 every 4 wks and that was adding up, sooooo…

Cut to me looking at more permanent solutions, which led me to Microshading. Many moons ago, I worked in a Maintenance Dept. of a school and a coworker had shaved off her brows and tattooed new ones turned green…looked like prison brows, no joke! This was my only reference of “tattooed brows.” So, I was quite concerned as I started my research. Let’s just say the art of tattooing has come a looooooong way and I promise your brows won’t turn green or look like you got them done in a prison yard. Lol!

To find your perfect artist…google is your friend, word of mouth, and insta/Facebook for pix. Look closely at the artist’s pictures. If you like their work, you will see every brow (that they’ve done) and think how great it looks. Every artist has different styles: some like heavy, thick brows and some are more delicate. The price can be anywhere from $500-$800. Some will give you a touch-up included in the initial price and some won’t.

The procedure itself takes a couple of hours and does not hurt. They numb you before they begin. My brow artist was able to make my girls pretty even after all these years! I am thrilled! No more peek-a-boo with my sunnies. The week after the treatment, your brows will be itchy and flaky. Do not get them get soggy wet for about 4 days and moisturize, moisturize, moisturize. My brows started out a reddish color, but have settled to a nice brown. Below I will show you some pix.

This is how they look now (8 wks out). I have 1 more week before I get my touchup. This pic makes me happy because I’m not doing anything to my face at all…before I got the micro shading I always made sure I raised my right eyebrow, so it wouldn’t look too different from my left. Or I made sure to tilt my head juuuust right, so the different height wouldn’t be quite so noticeable. I’m tired just rereading all the different smoke and mirror tricks I was trying, geez.

I hope this was helpful and if you’ve been on the fence, I say jump off and get some Microshading! It’s worth it.

Updated Video

I just wanted to show you what it looks like to get your brows done and the after effects.