Eye lash Serum

I’ve got some great news, I’d like to share! You do not need name-brand Latisse or even generic Latisse (which is still $200) to get your lashes to grow…

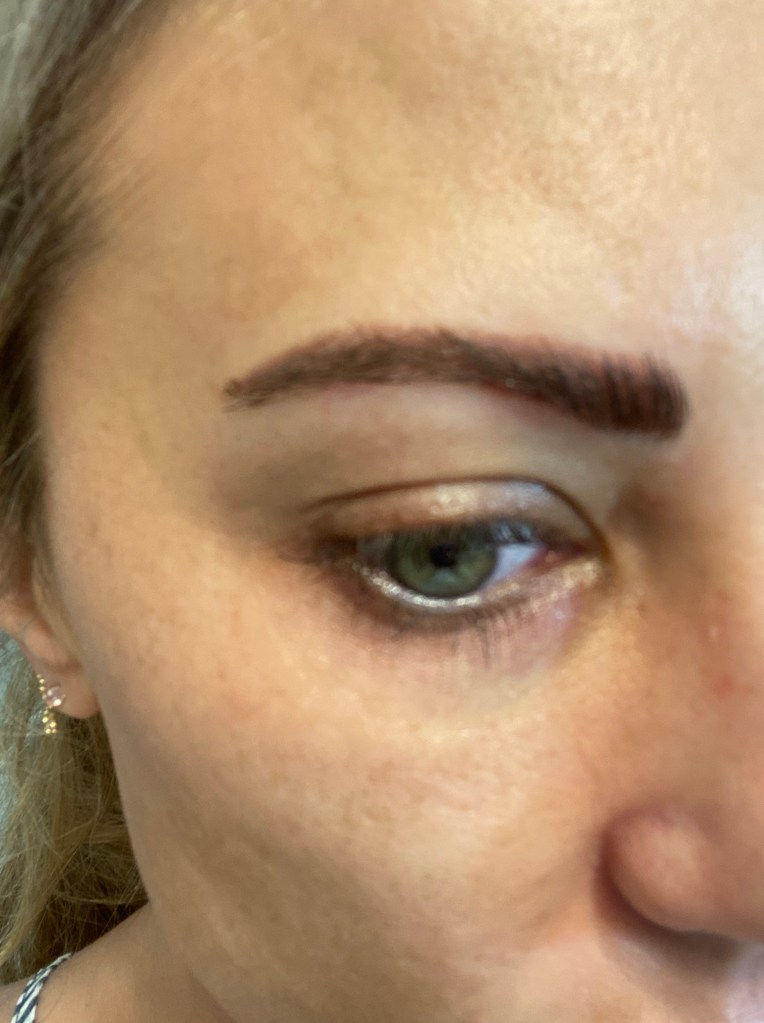
When I got my semi-permanent eyeliner, my eyeliner artist told me that the Latisse I was using was making my eyes extra sensitive. She recommended trying other brands, which I was hesitant to do because Latisse is the Gold Standard, right?! Wrong!

You can, literally, go on Amazon and pick any serum with good reviews and the ingredients are so good these days, it’ll work. Even Rodan + Fields is a good option (I do not like pyramid schemes, so purchase with caution). The Latisse, besides being horribly expensive, was making my eyes water and they were becoming a dull green, instead of the vibrant green, I was used to.

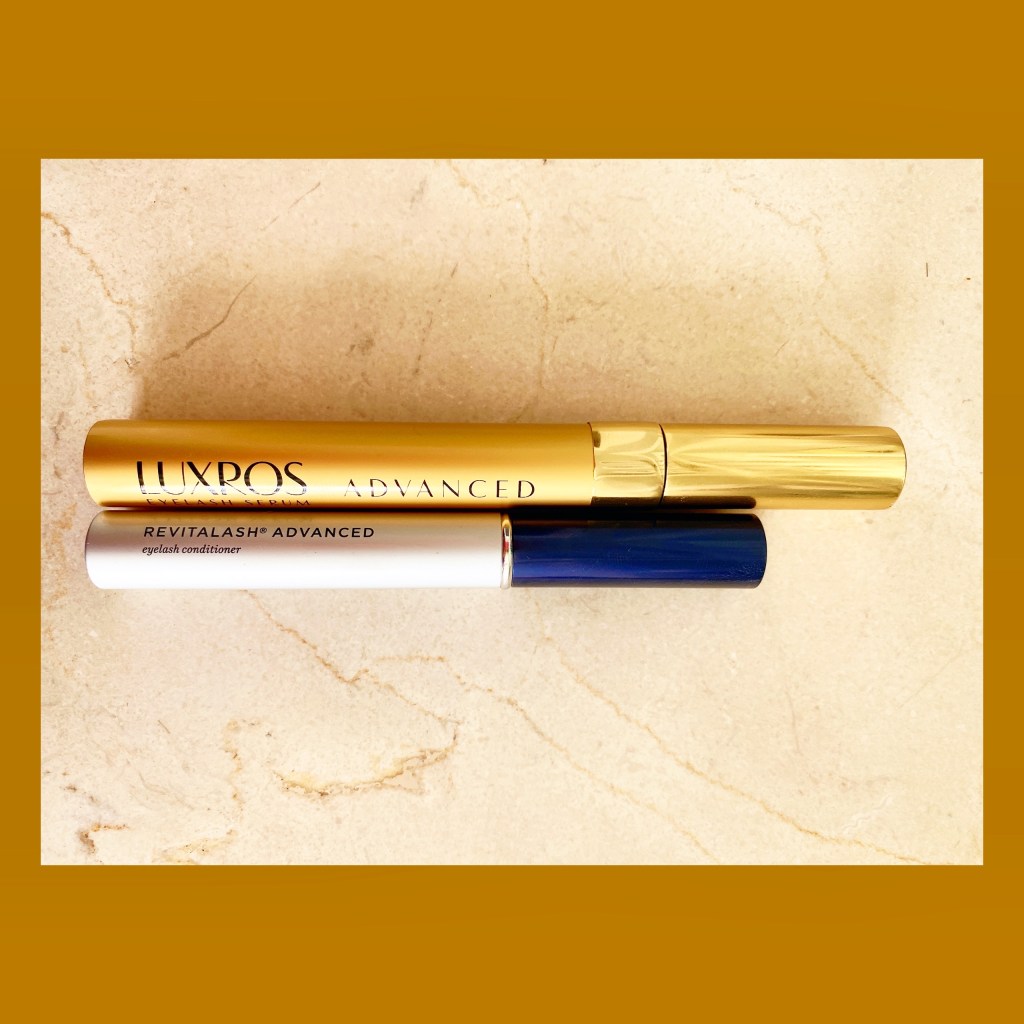
So the switch is in and I couldn’t be happier. My dermatologist sells Revitalash and I could get it for basically the same price as Amazon…I love to support small businesses when I can. I started trying the Revitalash and have not seen any difference to the Latisse, except for the price tag… $100 vs. $200. I just looked and Amazon is selling it for $50 this week…big steal.
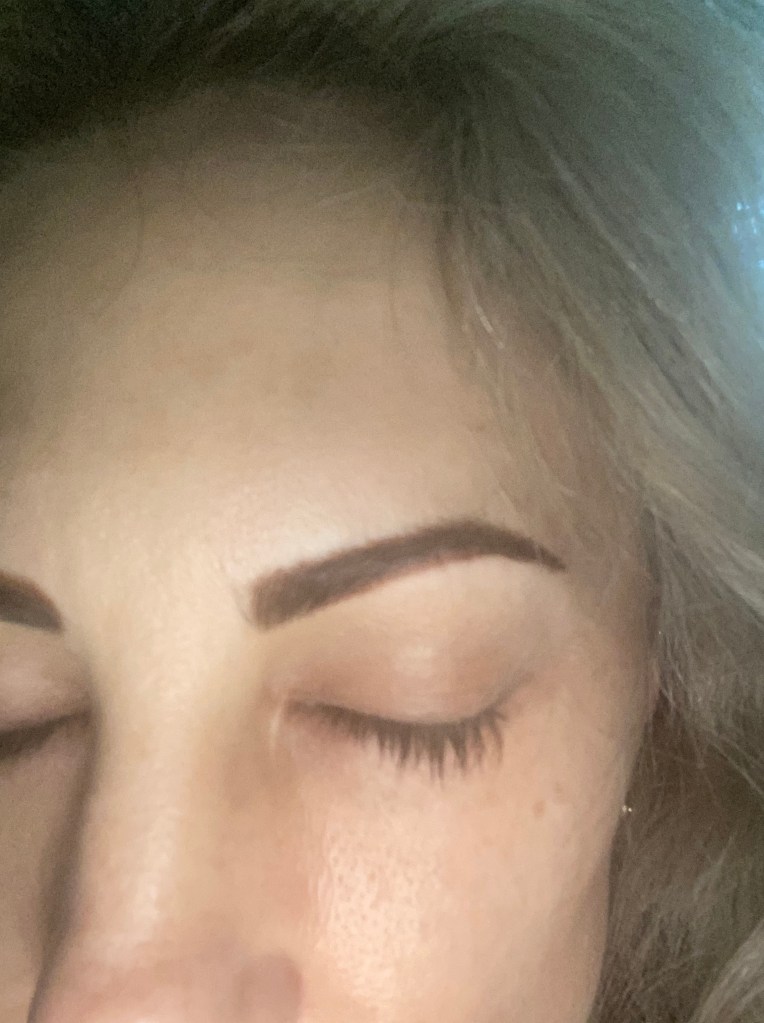
So, go ahead and try all the wonderful, new lash serums out there. You won’t be disappointed and your lashes will thank you! Ali Approved!

Tip: Put the serum on your eyebrows too, and watch them grow. (Sounds like I’m talking about a Chia Pet, remember those?) You’re welcome! Tee Hee!

https://smile.amazon.com/Eyelash-Eyebrow-Serum-Enhancer-Healthier/dp/B07RN2H1QW/ref=sr_1_2?crid=2VZCEIYBX8W31&dchild=1&keywords=luxros+eyelash+growth+serum&qid=1612206171&sprefix=luxros+eyelash+growth+serum%2Caps%2C330&sr=8-2

You can purchase these items here: http://www.amazon.com/shop/alisonviktorin

All About Brows

Microshading/Microblading

Just do it! Hahaha! If you’ve been on the fence about getting your brows microbladed or shaded, I’m here to tell you…it’s worth it.

First, let me give you a definition from healthline.com: Microshading is a procedure where a cosmetic technician applies semipermanent makeup to your eyebrows. It’s a type of cosmetic tattoo procedure. Using pigment ink and a handheld tool, the technician places tiny, pin-like dots over the brow area to fill in thin spots.

My brow journey started because my left eyebrow is higher than my right. Whenever I wear sunglasses my left eyebrow played peek-a-boo with the rim…It’s like Hey World, do you see me?! Ugh, so frustrating. So, I started getting them waxed, to help shape them and make them look at least, related. This didn’t work, so I started getting botox to bring my right side up to my left. This worked better, but I was still self-conscious, when the ‘tox started wearing off. In came Brow Lamination, this will be another blog post. The BL got me used to growing out my brows and seeing what they’d look like with more oomph. The problem was the price, I was spending over $100 every 4 wks and that was adding up, sooooo…

Cut to me looking at more permanent solutions, which led me to Microshading. Many moons ago, I worked in a Maintenance Dept. of a school and a coworker had shaved off her brows and tattooed new ones turned green…looked like prison brows, no joke! This was my only reference of “tattooed brows.” So, I was quite concerned as I started my research. Let’s just say the art of tattooing has come a looooooong way and I promise your brows won’t turn green or look like you got them done in a prison yard. Lol!

To find your perfect artist…google is your friend, word of mouth, and insta/Facebook for pix. Look closely at the artist’s pictures. If you like their work, you will see every brow (that they’ve done) and think how great it looks. Every artist has different styles: some like heavy, thick brows and some are more delicate. The price can be anywhere from $500-$800. Some will give you a touch-up included in the initial price and some won’t.

The procedure itself takes a couple of hours and does not hurt. They numb you before they begin. My brow artist was able to make my girls pretty even after all these years! I am thrilled! No more peek-a-boo with my sunnies. The week after the treatment, your brows will be itchy and flaky. Do not get them get soggy wet for about 4 days and moisturize, moisturize, moisturize. My brows started out a reddish color, but have settled to a nice brown. Below I will show you some pix.

This is how they look now (8 wks out). I have 1 more week before I get my touchup. This pic makes me happy because I’m not doing anything to my face at all…before I got the micro shading I always made sure I raised my right eyebrow, so it wouldn’t look too different from my left. Or I made sure to tilt my head juuuust right, so the different height wouldn’t be quite so noticeable. I’m tired just rereading all the different smoke and mirror tricks I was trying, geez.

I hope this was helpful and if you’ve been on the fence, I say jump off and get some Microshading! It’s worth it.

Updated Video

I just wanted to show you what it looks like to get your brows done and the after effects.

Beauty on a budget

Part 3…Peels (remember, I’m not a dermatologist or an aesthetician)

Glycolic Acid Peel

Ooooh Boy, is this good stuff! The Glycolic Acid Skin Peel from Skin Beauty is a Must in your skin care arsenal. All the plumping, all the glowing right here in this little bottle.

From Amazon: MULTI-PURPOSE REJUVENATING TREATMENT – This facial skin peel treats many skin issues including moisturizing dry skin, treating discoloration and age spots, repairing scars, decreasing fine lines and wrinkles, and rejuvenating the skin’s surface via increasing the rate of cell regeneration. https://smile.amazon.com/GLYCOLIC-Acid-Skin-Chemical-Peel/dp/B003SJ37SM/ref=sr_1_6?crid=1YTB7WNQA2R97&dchild=1&keywords=skin%2Bbeauty%2Bglycolic%2Bacid%2Bskin%2Bpeel&qid=1605562723&refinements=p_85%3A2470955011&rnid=2470954011&rps=1&sprefix=skin%2Bbeauty%2B%2Caps%2C172&sr=8-6&th=1

I put the peel on my skin with a brush, it helps me feel oh so profesh! Tee hee! If you are a newbie, where peels are concerned, start off leaving it on for only 3 minutes. You can always work your way up…not gonna lie, this peel packs a punch and you will feel all the tingles. Tingles = ants stinging your face…so have a fan handy. If you do nothing else to your skin, and you’re just a peel kinda person, you can use this every 4 wks or less. It’s up to you and how your face feels. The day after, you might feel like your skin looks fresh and beautiful…and also a bit tight. You might start to peel a bit, nothing crazy, days 3-5. By day 7, your makeup will be gliding on so smoothly and your skin will look rejuvenated and just plain lovely. Let me know if you feel the same after trying!

Glycolic Pads

These pads are oh so delightful! They are only 20% glycolic, so they can be used more frequently. 50 pads come in a container and here’s the Tip…cut the pads in 1/2 so you can have double the amount. The pads are fairly large, so cutting them in 1/2 won’t feel like you’re being cheap. They’re so large to begin with, it’s almost a waste if you don’t cut them. I use these in the evening, so all of the good “juice” soaks into my skin overnight. After using the pads on my face, I then rub it over my hands, knees, and elbows. Waste not Want not! Ha! Beauty on a Budget, am I right? https://smile.amazon.com/Glycolic-Acid-Exfoliating-Wipes-Hyperpigmentation/dp/B07C468P8P/ref=sr_1_3?dchild=1&keywords=touch+glycolic+acid+skin+pad&qid=1605567342&sr=8-3

Neutralizer

I would feel quite guilty if I didn’t let you know to buy a neutralizer for after-peel purposes. Neutralizers take the burning and tingle out of a peel, when you’re finished.

From Amazon: Professional grade chemical peel neutralizer. Helps to safely and effectively balance the pH of your skin by neutralizing the acid from the peel.

https://smile.amazon.com/QRxLabs-Chemical-Peel-Neutralizer-post-peel/dp/B06XT5S4B7/ref=sr_1_5?crid=3LLXFFRE8IAJI&dchild=1&keywords=chemical+peel+neutralizer&qid=1605567389&sprefix=peel+neutral%2Caps%2C229&sr=8-5

This was the last of the Beauty on a Budget Series. These 3 Parts are how I have stayed looking fresh even when low on cash. All 3 Parts have different price points…I would say this last part is the most important if you don’t have the extra funds for a Microneedling Pen or Microdermabrasion machine. Run on out and get a peel, if you do nothing else. You’re welcome!

Video Time

I’ve added a video so you can see the peel and brush in action. You’ll feel super professional if you use the brush…tee hee!

You can purchase these items here: http://www.amazon.com/shop/alisonviktorin